WordPress is among the worlds best blogging tools, allowing users with a fully customizable environment and an easeful backend interface for content administration and management.
While building a blog or a website on WordPress the user has many options to integrate social features into one’s site which might include leading platforms like Google +, Facebook, Twitter and so on.
We discuss integration of Facebook Social Plugins, which will allow the site to indulge more with its users allowing them to comment, discuss and share what they like in a user-friendly manner. One can come across various plugins available across wordpress.org plugin directory or one can even directly integrate the WordPress Theme as well. Depending on what you find easy you can implement the same.
Facebook Social Plugins
Social Plugins can allow your site users to comment on posts, like and share them on Facebook. The ones that are majorly used include:
- Comments
- Like Box
- Like Button
Facebook Application Creation
To use these plugins we will first require the creating of a Facebook application that would allow cross platform communication between Facebook and our website. To create an application we go to: https://developers.facebook.com/apps. Choose the option on right corner “Create New App”, upon pressing the button a pop-up window appears that allows the creating on a new application.
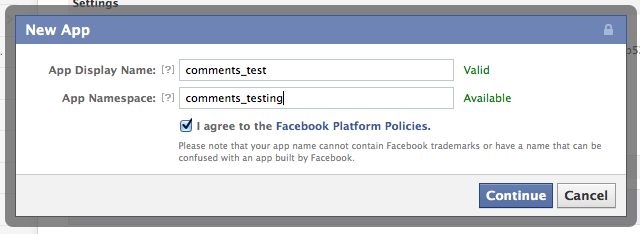
As shown in the image above we choose a Display Name for the application this can be your Website Name. App Namespace defines how the application would be known internally within Facebook, once done with the creation of the application you will have to adjust some application settings. The user is automatically directed to a summary page for the application. The summary page has various sections out on which will be currently just two of them.

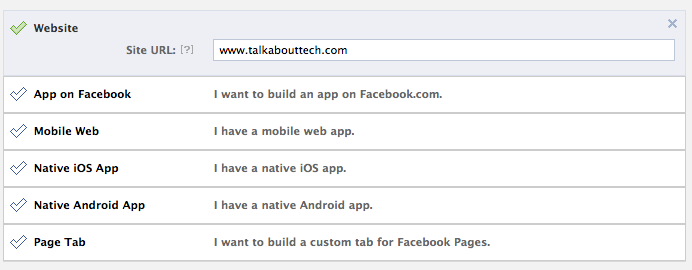
Under basic info section change we change the App Domain value to www.Your-Website.com, going further we tell Facebook as how our application works with Facebook. We do so by highlighting the Option Website and then again entering our website address, once all done we press save changes.
Social Plugin Implementation
From the above plugins lets consider the Comments Plugin to be integrated as a part of your themes code. Go to: https://developers.facebook.com/docs/reference/plugins/comments/
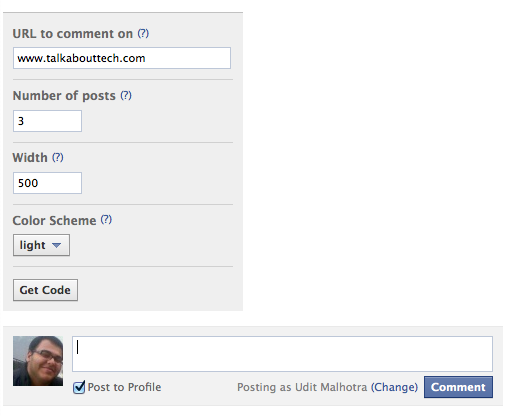
When the page opens you will see a box which would be identical to the image above, fill in the required fields include your website address, posts to display and color type you would like and click on Get Code. This generates a code that can be implemented within various pages of your site.
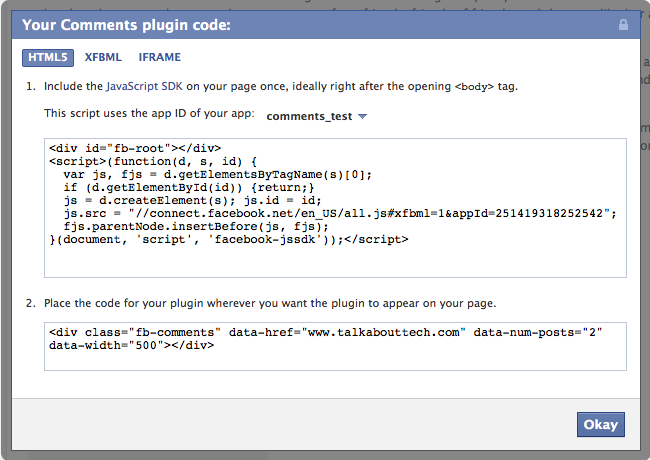
Now we are close to the implementation of the plugin, to finalize the implementation we need to follow a two-step process and we are done.
First we need to implement JavaScript SDK into the theme body tags, body tags can be found both in header.php and footer.php file of your WordPress Themes. The ideal placement area lies just after opening body tag. The JavaScript SDK Code is as below:
<div id=”fb-root”></div>
<script>
window.fbAsyncInit = function() {
FB.init({
appId : ‘YOUR_APP_ID’, // App ID
channelURL : ‘//WWW.YOUR_DOMAIN.COM/channel.html’, // Channel File
status : true, // check login status
cookie : true, // enable cookies to allow the server to access the session
oauth : true, // enable OAuth 2.0
xfbml : true // parse XFBML
});
// Additional initialization code here
};
// Load the SDK Asynchronously
(function(d){
var js, id = ‘facebook-jssdk’; if (d.getElementById(id)) {return;}
js = d.createElement(‘script’); js.id = id; js.async = true;
js.src = “//connect.facebook.net/en_US/all.js”;
d.getElementsByTagName(‘head’)[0].appendChild(js);
}(document));
</script>
In the above-mentioned code we will replace YOUR_APP_ID with the App ID generated in the comments code, for those of you who not aware of what App ID, check the highlighted part in the code below.
<div id=”fb-root”></div>
<script>(function(d, s, id) {
var js, fjs = d.getElementsByTagName(s)[0];
if (d.getElementById(id)) {return;}
js = d.createElement(s); js.id = id;
js.src = “//connect.facebook.net/en_US/all.js#xfbml=1&appId=119352884837162“;
fjs.parentNode.insertBefore(js, fjs);
}(document, ‘script’, ‘facebook-jssdk’));</script>
The second element to be changed from the JavaScript SDK is WWW.YOUR_DOMAIN.COM/channel.html, here we create an html file named as channel.html, and the purpose of creation of this file is to resolve cross-domain communication issue with certain browsers. The code that goes into the file is just one single line, which is described below.
<script src=”//connect.facebook.net/en_US/all.js”></script>
One the file is created upload to the root directory of your webhosting and change the value in the JavaScript SDK.
The Last step to complete the implementation is to edit the comments.php file of your WordPress theme and paste the code mentioned below.
<div class=”fb-comments” data-href=”YOUR-WEBSITE.COM” data-num-posts=”2″ data-width=”500″></div>
Just replace “YOUR-WEBSITE.COM” by your Website URL and you are done.
Alternatively if you are a newbie and don’t want to code or get confused with the same you can try popular WordPress Plugins Like DISQUS, Intense Debate Etc.
